Why Does My Bread Collapse? Causes, Fixes, & Prevention Tips
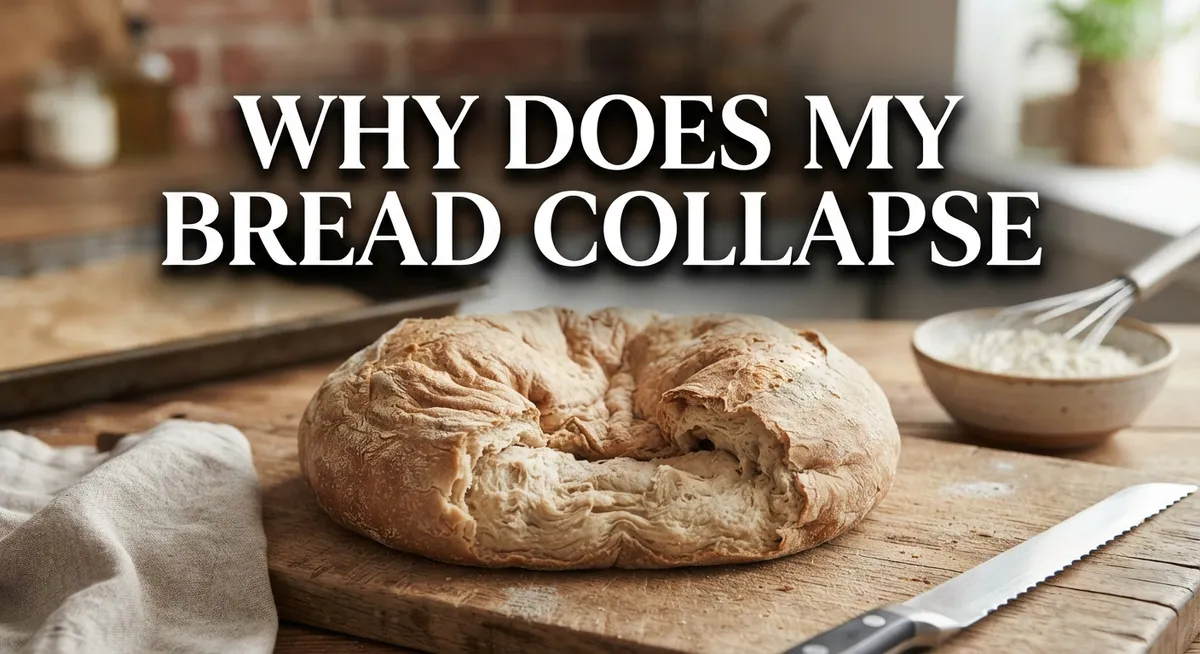
You pull your bread out of the oven, feeling proud. Then minutes later, it sinks in the middle.
Sound familiar? You’re not alone.
Bread collapse frustrates bakers at every skill level. One moment your loaf looks perfect. The next, it deflates like a popped balloon.
The good news is that this problem has clear causes. Your dough might rise for too long. It could lack the gluten strength to hold its shape. Sometimes the yeast works too fast, or the bread simply needs more time in the oven.
Small changes make a big difference. Adjusting your water amount, tracking proof time, or picking the right yeast can save your next loaf.
This guide breaks down exactly why bread collapses. We will cover the most common causes, from overproofing to weak gluten development.
You will also learn practical fixes you can use right away. These include tweaking your liquid measurements and controlling dough temperature.
By the end, you will understand how to spot warning signs early. You will bake loaves that hold their shape, rise beautifully, and stay tall from oven to table.
In a Nutshell
Here’s the quick rundown on why your bread collapses and how to stop it.
-
Overproofing weakens your dough. When dough rises too long, it loses strength and can’t hold its shape. This causes it to sink after baking.
-
Weak gluten means weak structure. Your dough needs properly developed gluten to trap gas bubbles. Without it, your bread deflates.
-
Underbaking leaves the inside wet. If the center never fully sets, the loaf collapses as it cools. Always check for a firm interior.
-
Too much yeast speeds things up too fast. This creates a quick, unstable rise. Cutting back slightly often solves the problem.
-
Excess liquid softens your dough too much. Wet dough struggles to hold its structure. Reducing water by a tablespoon or two can help.
-
Cooling and slicing too soon disrupts the crumb. Bread needs time to set after baking. Patience here protects your final loaf.
Small tweaks to yeast, hydration, and timing fix most collapse issues fast.
Understanding the Bread-Baking Process: How Structure Forms
Bread structure forms through a series of chemical and physical changes that happen before, during, and after baking. Understanding this process helps you prevent collapse.
Gluten development is the foundation. When you mix flour with water, proteins in the flour bond together and create gluten. This network acts like a net that traps gas bubbles produced by yeast. Strong gluten means your dough can expand without tearing or losing shape. Weak gluten cannot hold gas effectively, and the bread falls flat.
Fermentation creates the rise. Yeast eats sugars in the dough and produces carbon dioxide gas. This gas fills tiny pockets throughout the dough, making it light and airy. Temperature controls how fast this happens. Warm conditions speed up fermentation, while cold temperatures slow it down.
Heat sets the structure permanently. When bread enters the oven, several things occur at once. The yeast dies from heat, so gas production stops. Starches in the flour gelatinize and firm up. Proteins coagulate and harden. Water evaporates from the surface, creating a crust. This heat-driven process transforms soft, stretchy dough into solid bread with a fixed crumb structure.
Cooling completes the process. As bread cools, the crumb continues to set and firm up. The crust hardens further. This final stage is essential because cutting into hot bread disrupts the structure before it fully solidifies.
Why this matters for collapse: If any step in this process goes wrong, collapse happens. Overproofing exhausts the gluten before baking starts. Underbaking means the crumb never sets properly. Excess yeast or liquid disrupts the balance needed for stable gas retention.
Proper timing, ingredient ratios, and temperature control keep all these steps working together smoothly. This creates bread that holds its shape from mixing through cooling.
Top Causes of Bread Collapse
Your bread collapses because one or more steps in the baking process go wrong. Let’s break down the main culprits so you can fix them.
Overproofing is the biggest problem. When dough rises too long, the gluten strands stretch and weaken. The dough can no longer hold the gas bubbles inside. Your loaf rises beautifully in the bowl, then falls flat in the oven or cools down completely deflated.
Weak gluten structure is the second major cause. Gluten acts like tiny elastic bands that trap air bubbles. If you skip kneading or mixing, gluten never develops properly. Your dough feels soft and slack instead of smooth and springy. Weak dough cannot support its own weight during baking.
Too much liquid makes dough too soft. Bread dough needs enough water to activate the flour, but excess water creates a soupy mixture. Wet dough spreads out instead of rising up. It collapses because it cannot hold its shape at all.
Excessive yeast causes a fast, unstable rise. More yeast means faster fermentation. The dough rises quickly but unevenly. Gas bubbles form too fast and burst before the oven heat sets the structure. The result is a collapsed loaf with a dense, gummy crumb.
Underbaking leaves the center raw. If bread comes out too early, the interior stays wet and soft. As the loaf cools, the wet center cannot support the crust. The bread sinks inward.
Temperature problems affect how fast dough rises. Warm kitchens speed up fermentation. Cold water slows it down. If your dough ferments too quickly, you lose control over timing and structure.
Each cause has a simple fix. Monitor your proofing time closely. Mix flour and water properly to build gluten. Measure your ingredients accurately. Control your kitchen temperature. These small adjustments prevent collapse and give you consistent, sturdy bread every time.
The Role of Gluten Development in Preventing Collapse
Gluten is the protein network that holds your bread together. Think of it as thousands of tiny elastic bands trapping air bubbles throughout your dough. Without strong gluten, those bubbles escape or collapse, and your bread falls flat.
When you mix flour with water, gluten proteins start bonding. This bonding process is called gluten development. You activate it through mixing and kneading. The more you develop gluten, the stronger your dough becomes.
Strong gluten holds gas better during fermentation. Your yeast produces carbon dioxide, which inflates thousands of tiny bubbles. If gluten is weak, these bubbles burst or merge together. The dough loses its ability to support itself.
Here’s what happens during baking. Heat causes gluten to set permanently. The proteins tighten and create a stable structure. This is why proper gluten development before proofing matters so much. You can’t fix weak gluten once baking starts.
Many bakers skip or rush the kneading step. They mix just until ingredients combine. This leaves gluten underdeveloped. Your dough rises okay during fermentation, but the structure isn’t strong enough. When the loaf cools, it collapses inward.
The timing of gluten development is critical. You need to develop it before your first rise. During fermentation, gluten continues to strengthen slightly, but most development happens during mixing and kneading.
If your bread collapses, weak gluten is often the culprit. Check your mixing technique first. Knead longer than you think necessary. Use a stand mixer if hand kneading feels difficult. The dough should feel smooth and elastic, not sticky and loose.
Temperature also affects gluten. Cold water slows fermentation and gives gluten more time to strengthen. Warm water speeds everything up. This is why controlling water temperature helps prevent collapse.
How Proofing Time and Temperature Affect Your Loaf
Proofing time and temperature work together to control how fast your dough rises. When you understand this relationship, you can prevent collapse before it happens.
Temperature speeds up or slows down fermentation. Warm dough ferments faster because yeast works harder in heat. Cold dough ferments slowly. Room temperature (around 70 to 75 degrees Fahrenheit) gives you a moderate rise. If your kitchen is hot, your dough may overproof in half the normal time. This is why collapse happens so easily in summer.
The longer dough proofs, the weaker it becomes. Your yeast keeps eating sugars and producing gas. The gluten strands stretch thinner and thinner. Eventually they tear. This is overproofing. You can test if dough is ready by poking it gently with your finger. If the indent springs back slowly, it’s ready. If it doesn’t spring back at all, you’ve waited too long.
Use cold water to slow fermentation and buy yourself more time. Cold water lets you proof longer without overproofing. This gives gluten more time to develop strength naturally. You can also proof in a cooler spot, like a basement or pantry, instead of on a warm counter.
Shorter proofing times need warmer temperatures. Longer proofing times work better with cooler temperatures. A slow, cold rise overnight produces better flavor and stronger structure than a fast, warm rise.
Monitor your dough carefully during proofing. Don’t rely on clock time alone. Every kitchen is different. Humidity, room temperature, and yeast type all affect how fast dough rises. Watch the dough itself, not just the timer. When it looks puffy and feels light, it’s ready for the oven. If you wait until it collapses or splits on top, you’ve gone too far.
Step-by-Step Fixes for a Collapsing Loaf
Start by checking your yeast amount. If your dough rises too fast and collapses, you likely used too much yeast. Reduce the yeast by 1/8 to 1/4 teaspoon and try again. This slows fermentation and gives your gluten time to strengthen properly.
Next, examine your dough’s wetness. Dough that feels sticky or overly soft cannot hold its shape. Decrease the water or milk by 1 to 2 tablespoons in your next batch. Wetter dough needs stronger gluten to support the extra moisture.
Check your proofing time carefully. Set a timer and watch your dough rise. When it doubles in size, stop the proofing immediately. Poke the dough gently with your finger. If the indent springs back slowly, it’s ready. If it doesn’t spring back at all, you’ve overproofed.
Use cold water instead of warm water to slow down the rising process. Cold water gives you more control over fermentation speed. This prevents your dough from rising too fast and collapsing before baking.
Develop your gluten properly before the first rise. Knead the dough for 8 to 10 minutes by hand or 5 to 6 minutes in a mixer. Strong gluten holds gas bubbles better and prevents collapse during baking.
Check your oven temperature with a thermometer. Underbaking causes collapse because the interior stays wet and weak. Bake until your bread reaches an internal temperature of 205 to 210 degrees Fahrenheit. This ensures the center sets completely.
Finally, let your bread cool completely before slicing. Hot bread is still soft inside. Cutting too early releases steam and can cause the loaf to deflate. Wait at least one hour after removing the bread from the oven.
Common Mistakes That Lead to Bread Collapse
Bread collapse happens when bakers make preventable errors during mixing, proofing, or baking. Understanding these mistakes helps you fix your loaves and stop the problem from repeating.
Overproofing is the biggest culprit. Your dough rises too long and loses its strength to hold gas bubbles. The gluten network stretches thin and can’t support the bread’s weight. You’ll notice this when your dough springs back slowly during the poke test or deflates in the oven.
Using too much yeast creates a second major problem. Extra yeast ferments your dough too fast, producing gas quicker than your gluten can develop. The rise happens so quickly that the structure becomes weak and unstable. Your bread then collapses under its own weight.
Excessive hydration weakens your dough. Too much water makes the dough slack and unable to hold its shape. The gluten can’t form strong bonds when there’s too much liquid. Your loaf spreads instead of rising upward, then falls flat.
Poor yeast storage ruins your results without you realizing it. Yeast loses power over time, especially if stored in warm or humid conditions. Weak yeast produces fewer gas bubbles, leaving your dough unable to rise properly or maintain structure.
Skipping or rushing gluten development leaves your bread vulnerable. If you don’t knead long enough, gluten strands stay weak and loose. Weak gluten can’t trap carbon dioxide effectively, and your loaf collapses during baking.
Underbaking is often overlooked. If you pull your bread from the oven too early, the center stays soft and wet. The structure hasn’t set yet, so the bread sinks as it cools. A properly baked loaf has a firm crumb throughout.
Slicing bread while it’s still hot also causes collapse. Steam inside the loaf hasn’t fully escaped, and cutting releases pressure. Wait until your bread cools completely before slicing.
Troubleshooting Specific Collapse Patterns
When your bread collapses, the collapse pattern itself tells you what went wrong. Different collapse types point to different causes, so learning to identify them helps you fix the problem.
Collapse at the top or sides suggests your dough rose too fast and too high. This happens when yeast works overtime or when you proof in a warm spot. Your dough expanded beyond what the gluten structure could support, so it caved in during baking. The fix is simple: use less yeast or proof in a cooler location next time.
A sunken center with firm edges means your dough was likely overproofed. The outer crust set in the oven while the inside was still weak from too much fermentation. Check your proofing time. Your dough should rise until it’s puffy but still springs back slightly when you poke it.
Collapse during or right after baking often points to underbaking or excessive hydration. If your dough is too wet, it can’t support its own weight in the oven. Reduce your water by one to two tablespoons in your next batch. Also, make sure your oven reaches full temperature before you bake.
A flat, dense loaf that never rises much indicates weak gluten or dead yeast. Check that your yeast isn’t expired and that you’re kneading long enough to build gluten strength. Dead or weak yeast simply won’t create enough gas to lift your bread properly.
Holes that collapse into tunnels happen when gas pockets form unevenly. This usually means you didn’t shape your dough carefully or you skipped degassing steps. Take time to gently fold and shape your dough to distribute yeast activity evenly.
Pay close attention to where and when your bread falls. This observation becomes your troubleshooting guide for better results next time.
Final Thoughts
Bread collapse feels frustrating, but it’s fixable. Most problems come down to timing, hydration, or gluten strength. Once you understand these factors, you gain control over your results.
Small adjustments make a big difference. Cutting back yeast slightly or reducing water by a tablespoon can transform your loaf. These tiny tweaks often solve big problems.
Patience matters more than speed in bread baking. Rushing your proofing time or skipping gluten development sets you up for failure. Give your dough the time it truly needs.
Your oven temperature plays a bigger role than most bakers realize. An inaccurate oven leads to underbaked centers and collapsed loaves. A simple thermometer check saves you from repeated disappointment.
Remember that every loaf teaches you something new. If your bread collapses, look at the pattern. The shape of your failure points directly to its cause.
Keep notes on what you tried and what worked. Baking is part science and part practice. Your memory improves with each attempt you make.
Don’t get discouraged by a sunken loaf or two. Even experienced bakers face collapsed bread from time to time. What matters is learning from each attempt and adjusting your approach.
Trust the process and stay consistent with your methods. Measure your ingredients carefully and watch your dough closely. Small consistency habits lead to reliable, tall loaves over time.
Bread baking rewards attention and care. When you respect proofing times, hydration levels, and gluten development, your bread rises properly and holds its shape. This balance is the real secret behind every beautiful loaf.
With these fixes in mind, you’re ready to bake with confidence. Your next loaf can rise tall, bake evenly, and taste amazing. Keep practicing, and collapse will soon become a rare problem.
Frequently Asked Questions
How can I tell if my dough is overproofed before baking?
Overproofed dough shows clear warning signs. Press your finger gently into the dough. If the indent springs back slowly or doesn’t bounce back at all, your dough has likely overproofed. The dough may also feel sticky and weak.
Another test is the “poke test.” Poke the dough with a floured finger. A properly proofed dough springs back halfway. An overproofed dough stays dented.
What’s the difference between instant yeast and active dry yeast for collapse prevention?
Instant yeast ferments faster than active dry yeast. This speed can lead to collapse if you’re not careful with timing. Active dry yeast gives you more time to work and monitor your dough.
Choose instant yeast only if you’re comfortable watching your dough closely. Active dry yeast is more forgiving for beginners. Both types work well when you control fermentation temperature and timing properly.
Can I fix dough that’s too wet before it bakes?
Yes, but your options are limited. Add flour slowly, one tablespoon at a time, while kneading. Stop when your dough feels slightly tacky but not sticky.
Alternatively, reduce water in your next batch by 1 to 2 tablespoons. Keep detailed notes of what you changed. This helps you find your ideal hydration level faster.
Why does my bread collapse only on one side?
Uneven collapse usually means uneven heat in your oven. One side bakes faster than the other, creating weak spots. Rotate your bread halfway through baking to fix this.
Uneven proofing also causes this problem. Make sure your dough sits in a spot with consistent temperature and no drafts.

DK Jacks is a passionate food enthusiast, recipe developer, and culinary explorer. With a love for both traditional and innovative flavors, DK brings a fresh perspective to the kitchen. When not experimenting with new ingredients, you’ll find DK capturing food moments through the lens or sharing cooking tips with fellow foodies.🍽️📸✨