
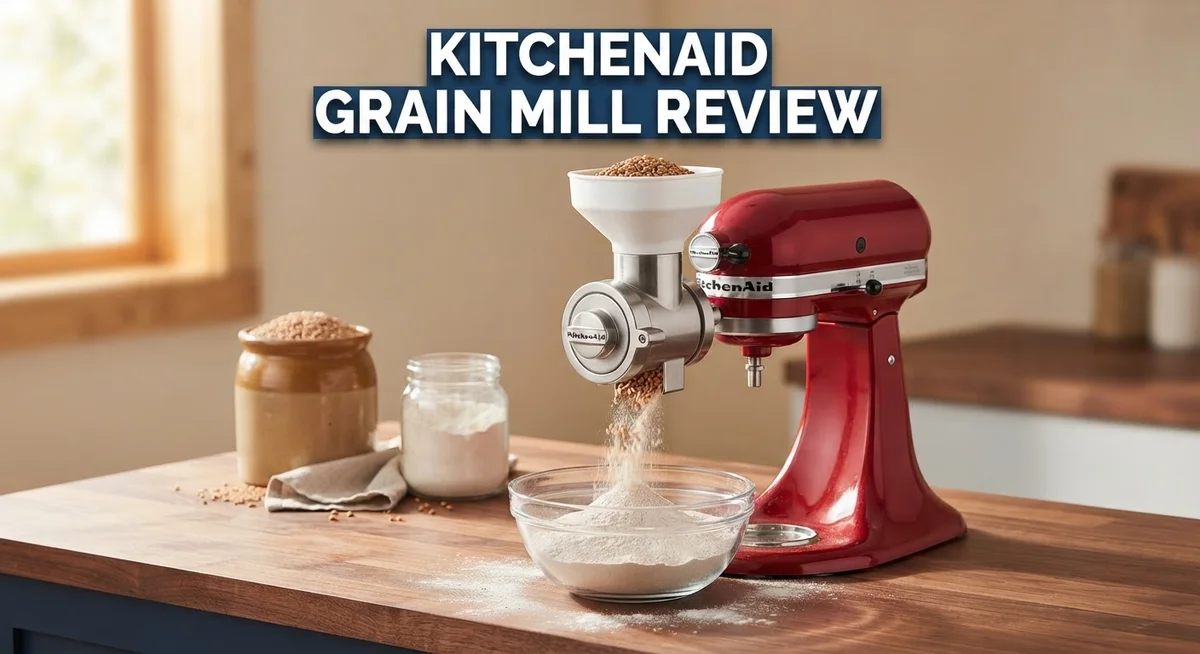
KitchenAid Grain Mill Review: Grinding Grains at Home?
Do you own a KitchenAid stand mixer? You can turn it into a grain mill. The KitchenAid Grain Mill attachment grinds wheat, corn, and other grains right at home.
This small tool fits onto your mixer. It saves counter space compared to standalone mills. You get fresh flour without buying a new machine.
But does it work well? This review covers everything you need to know. We look at how it grinds, how loud it gets, and how it handles different grains.
Fresh flour sounds great. But this mill has quirks you should know first. It runs slow. It heats up fast. It gets noisy too.
We tested its grind quality, ease of cleaning, and overall performance. You will learn if this attachment fits your kitchen needs. Let’s find out if it earns a spot on your counter.
In a Nutshell
Here is the quick rundown on the KitchenAid Grain Mill attachment. We break down what it does well and where it falls short.
-
Simple attachment design. It connects to your stand mixer and saves counter space. You get 9 grind settings to choose from, ranging from coarse to fine.
-
Grinding takes patience. This mill runs slow, especially when you want fine flour. Plan extra time for your baking prep.
-
Noise and dust are real factors. The mill gets loud during operation. Expect some flour dust to escape as it grinds.
-
Heat build up limits batches. After 2 to 3 batches, the mill needs to cool down. Fine grinding creates extra heat, so your flour may come out warm.
-
Cleaning stays easy. A brush handles grain switches. A toothpick clears small debris from tight spots.
-
Best suited for occasional use. This tool works well for small batches and cracked grains. Heavy bakers may want a dedicated mill instead.
Build Quality and Construction
The KitchenAid Grain Mill attachment uses all-metal construction throughout. This means you get durable components that resist wear over time. The grinding mechanism sits inside a sturdy housing that connects directly to your mixer’s power head.
The attachment measures small enough to store easily. It doesn’t take up much cabinet space compared to standalone mills. The compact design makes it practical for kitchens where counter room matters.
Metal burrs handle the actual grinding work. These burrs stay sharp and consistent across multiple uses. The design allows you to adjust between 9 different grind settings. You can move from coarse cracked grains to very fine flour with simple adjustments.
The hopper holds up to 3 cups of grain per batch. This size works well for home bakers who grind occasionally. The chute directs flour into your bowl or container below. Everything connects securely to prevent grain from spilling during operation.
Heat becomes a real concern with the construction. The metal parts warm up quickly during grinding. After 2 to 3 batches, the mill reaches temperatures that require cooldown time. This happens because the mechanism generates friction as it processes grain. The flour itself comes out warm, especially when you grind to fine textures.
The metal housing does trap some flour dust inside. This dust settles in crevices and corners. You’ll need a small brush to clean between the burrs after each use. A toothpick helps remove stubborn grain pieces stuck in tight spots.
The overall build feels solid and reliable. The metal components don’t rattle or shift during operation. Connections stay tight without loosening after repeated use. The attachment integrates smoothly with your mixer’s power system.
One limitation exists with this construction: the fine grinding setting produces excessive heat. This thermal output can affect flour quality. Dedicated standalone mills manage heat better because they have larger motors and better cooling systems. The KitchenAid attachment trades some performance for its compact size and attachment convenience.

- Grinds Low-Moisture Grains (Wheat, Corn, Rice, Etc;) From Coarse to Fine
- Model Number :KGM

Last update on 2026-06-09 / Affiliate links / Images from Amazon Product Advertising API
Grinding Performance and Consistency
The KitchenAid Grain Mill attachment delivers consistent grinding results when you understand its limitations. The nine grind settings range from coarse to fine, giving you flexibility for different flour types and recipes.
Coarse grinding works exceptionally well. Cracked grains and coarse meals come out uniform and ready to use. The metal burrs perform reliably at these settings. You get predictable results batch after batch.
Medium grinds also perform solidly. The attachment maintains steady output without major quality drops. Most home bakers find this range satisfactory for everyday baking needs.
Fine grinding presents the real challenge. The consistency remains good, but speed drops significantly. Waiting for fine flour tests your patience. The grinding process slows to a crawl, and the motor works harder. This increased effort generates substantial heat. Your flour exits noticeably warm to the touch.
Heat management directly affects your grinding performance. After two to three batches, the mill needs a cooldown period. Pushing through this limit risks damaging the motor or producing inferior flour. Plan your grinding sessions accordingly. Small batches work better than attempting large quantities at once.
Flour texture itself stays uniform throughout each batch. You won’t find lumps or inconsistent particle sizes. The all-metal construction ensures steady burr performance. This reliability makes it dependable for repeated use, provided you respect the cooldown requirements.
Dust production impacts your grinding experience. Fine flour creates excessive airborne particles. Your kitchen gets messy quickly. Dedicated mills handle this better, but the KitchenAid attachment doesn’t isolate dust effectively.
Compared to standalone grain mills, this attachment produces lower flour quality overall. Mockmill and other dedicated options grind faster and cooler. However, for occasional small-batch grinding, the KitchenAid performs adequately.
The key to satisfaction lies in realistic expectations. Use this attachment for cracked grains and medium grinds. Accept the slow speed for fine flour. Respect the heat limitations. When you work within these boundaries, the KitchenAid Grain Mill delivers consistent, usable results for home grinding projects.
Capacity, Speed, and Noise Levels
The KitchenAid Grain Mill attachment holds 3 cups of grain per batch. You can process up to 10 cups of flour total before the mill needs to cool down. This capacity works well for home bakers who grind small amounts regularly.
Speed is the biggest trade-off with this attachment. Grinding happens slowly, particularly when you select fine flour settings. Coarse and medium grinds move faster through the burrs. If you need flour quickly, expect to wait. The slow pace reflects the attachment’s design as an add-on tool rather than a standalone mill.
Noise levels reach significant volumes during operation. The mill produces loud grinding sounds that can disturb others nearby. Many users report the noise as one of the most challenging aspects of ownership. Running the mill during off-peak hours helps minimize disruption in shared spaces.
Heat generation directly impacts your grinding sessions. After processing 2 to 3 batches consecutively, the mill becomes too hot to touch. The metal construction absorbs and retains heat from the grinding action. Fine grinding settings produce the most heat buildup. You must allow cooling time between batches, typically 15 to 30 minutes depending on outside temperature.
Flour dust production is another consideration. The metal housing traps some flour particles inside during operation. This dust affects both the machine and your kitchen air quality. Grinding cracked grains produces less dust than fine flour settings. The hopper design contributes to dust escape during the grinding process.
Temperature affects flour quality directly. Hot flour that exits the burrs can compromise nutritional value and storage life. Cool flour stores better and maintains fresher taste longer. Spacing out your batches ensures cooler end products.
For occasional grinding of small batches and cracked grains, this attachment performs adequately. Users who expect rapid, fine flour production from a single session will find limitations. Understanding these capacity, speed, and noise characteristics helps you decide if this attachment fits your grinding needs.
Top 3 Alternatives
Mockmill Grain Mill
- Grinds Low-Moisture Grains (Wheat, Corn, Rice, Etc;) From Coarse to Fine
- Model Number :KGM
Last update on 2026-06-09 / Affiliate links / Images from Amazon Product Advertising API
The Mockmill Grain Mill offers precision grinding for home bakers and health-conscious cooks. This electric mill grinds grains into flour with consistent texture and quality. You control the grind setting from coarse to fine, making it versatile for different recipes.
The motor runs quietly compared to many alternatives. Heat generation stays low during grinding, which helps preserve nutrients in your grains. The hopper holds a decent amount of grain, so you don’t refill constantly.
Nutrimill Grain Mill
- Grinds Low-Moisture Grains (Wheat, Corn, Rice, Etc;) From Coarse to Fine
- Model Number :KGM
Last update on 2026-06-09 / Affiliate links / Images from Amazon Product Advertising API
The Nutrimill Grain Mill focuses on fast, efficient grinding without compromising grain integrity. Its powerful motor processes grains quickly while keeping temperatures down. This matters because heat can destroy valuable enzymes and nutrients you want to keep.
The design features easy cleanup and straightforward assembly. You get adjustable fineness settings to match your baking needs. The mill handles various grains well, from soft wheat to harder seeds.
Wondermill Classic Mill

- FASTER and MORE EFFICIENT THAN OTHER HAND MILLS - The Wonder Junior Deluxe hand crank grain mill can grind 1.25 cups of flour...
- HEAVY-DUTY CONSTRUCTION; LIFETIME DURABILITY - Built to last a lifetime of use with a heavy duty unibody construction made...
Last update on 2026-06-09 / Affiliate links / Images from Amazon Product Advertising API
The Wondermill Classic Mill delivers reliable performance for serious grain grinding. This option appeals to people who want durability and simplicity. The motor operates smoothly, and the grinding mechanism produces uniform flour texture.
You’ll appreciate the compact footprint if your kitchen space is limited. The mill grinds at a moderate speed, allowing you to process batches without rushing. Setup takes minutes, and maintenance stays straightforward.
Each of these mills serves different preferences. Some users prioritize speed, others want quiet operation, and many seek the best nutrient preservation. Consider what matters most for your baking and cooking routine.
Ease of Cleaning and Maintenance
Cleaning the KitchenAid Grain Mill attachment is straightforward. You get a dedicated brush with the unit. Use it between grinding different grain types to remove residual particles.
For stuck debris, a toothpick works perfectly. Push it through the small openings to dislodge any trapped flour. This simple approach keeps your burrs in good working condition.
The all-metal construction makes cleaning safer than plastic alternatives. Metal resists damage from water and brushing. You won’t worry about scratches or warping during maintenance.
Disassembly is minimal. Remove the hopper and grain container. Wipe down the exterior housing with a dry cloth. Most flour dust sits on the outside, not deep inside the mechanism.
However, flour dust does accumulate inside the metal housing. Some powder settles near the grinding chamber. A soft brush helps reach these spots without forcing anything. Avoid excessive moisture. Metal parts can rust if you don’t dry them completely.
Storage requires attention too. Keep the attachment in a dry place. Humidity causes metal burrs to corrode slowly over time. Store the brush and toothpick together with the unit so you have them ready.
The burrs themselves need occasional inspection. Look for flour buildup around the grinding surfaces. If you notice clumping, the brush and toothpick combination handles it easily.
One maintenance note: heat buildup affects longevity. After grinding sessions, let the attachment cool before storing it. This prevents moisture from condensing on hot metal parts.
Regular use actually helps maintenance. Grinding keeps the burrs from becoming stiff. Occasional grinding sessions prevent rust formation better than long storage periods.
The brush included with your KitchenAid Grain Mill is your main cleaning tool. It does the job well for routine maintenance. Between that and a toothpick, you have everything needed to keep this attachment in working order. Simple maintenance means your grain mill stays reliable for years of occasional use.
Heat Management and Cooling Requirements
The KitchenAid Grain Mill attachment generates substantial heat during operation, especially when grinding fine flour. Your flour comes out noticeably warm to the touch. This heat buildup is one of the most important factors you need to manage for successful grinding sessions.
Heat accumulation happens quickly with this attachment. You can grind about 2 to 3 batches before the motor needs a break. After reaching maximum temperature, the attachment simply stops working until it cools down. This cooldown period typically takes 15 to 20 minutes, depending on your kitchen temperature and how intensely you used the mill.
Fine grinding produces the most heat. When you select the finest grind setting, the burrs work harder and create friction. The motor strains more. Your flour temperature rises significantly. Coarse and medium grinds generate less heat overall, so you can process more grain before needing a cooldown break.
Plan your grinding sessions strategically. If you need large quantities of flour, grind in batches with cooling periods between them. This prevents overheating and keeps your mixer’s motor safe. Never push through the heat. Stopping when the attachment gets hot protects both the equipment and your flour quality.
The all-metal construction helps with heat distribution, but it also means the exterior gets warm during operation. Be careful when handling the attachment right after grinding. Let it cool before touching the metal parts directly.
Ambient temperature matters too. Grinding in a warm kitchen generates more heat stress than working in a cool space. Summer grinding sessions require more frequent cooldown breaks than winter sessions.
Store your attachment in a dry location. Heat and humidity together can affect the burrs and internal components over time. Proper storage between uses helps maintain consistent performance.
For occasional small-batch grinding of cracked grains and medium textures, heat management is manageable. You simply work in shorter sessions with planned breaks. This realistic approach keeps your grinding experience positive and protects your equipment from damage.
Pros and Cons
Pros
- Compact attachment design saves valuable counter and cabinet space in your kitchen
- All metal construction makes cleaning safer and more durable than plastic alternatives
- Works well for grinding cracked grains and producing consistent textures
- Simple maintenance with just a brush and toothpick for occasional debris removal
- Produces fine, uniform grinds when the attachment operates at peak performance
Cons
- Grinding speed is slow, especially when you need fine flour for baking projects
- Operation creates very loud noise levels that may disturb others nearby
- Generates substantial flour dust that settles inside the metal housing and around your workspace
- Overheats after 2 to 3 batches, requiring cooldown periods before you can continue grinding, and produces hot flour that affects final quality
Who Should Buy It
The KitchenAid Grain Mill works best for specific types of home bakers and grain enthusiasts. You should consider this attachment if you already own a compatible KitchenAid stand mixer and want to avoid buying another kitchen appliance.
Occasional bakers benefit most from this mill. If you grind grains only a few times per month, this attachment fits your needs perfectly. You won’t hit the heat limits that plague heavy users. Your mixer stays in the kitchen doing double duty instead of taking up extra counter space.
People who enjoy cracked grains and coarse textures should buy this model. The mill excels at producing cracked wheat, cracked corn, and similar textures. You get consistent results without the frustration of fine flour grinding.
Homesteaders on a budget make good candidates too. You have a mixer already. Adding this attachment costs far less than purchasing a standalone grain mill. You can start experimenting with home grain grinding without a major investment in new equipment.
Skip this mill if you need fine flour regularly. Serious bread bakers who grind wheat berries into smooth flour every week will feel disappointed. The slow speed and heat buildup create real problems. Fine grinding produces flour so hot you must let it cool before using it. Dedicated mills like the Mockmill produce superior flour quality for serious bakers.
Large batch grinding isn’t your friend here. The 3 cup hopper and 10 cup total capacity before cooldown means you work in small batches. Commercial bakers or anyone needing pounds of flour should look elsewhere.
Noise sensitive households should think twice. This attachment runs loud. If your kitchen sits near bedrooms or living spaces where others sleep or relax, the noise becomes a real issue during grinding sessions.
Families with existing KitchenAid mixers who want to explore grain grinding casually represent the ideal customer. You get functionality without cluttering your kitchen. You can test whether home grain grinding fits your lifestyle before upgrading to a dedicated mill later.
Final Verdict
The KitchenAid Grain Mill attachment fits a specific need. It works best for home cooks who grind small amounts of grain now and then.
If you already own a KitchenAid mixer, this attachment makes sense. You skip buying a separate machine and save cabinet space.
Casual bakers get the most value here. You grind enough grain for a loaf or two without needing constant fine flour production.
Homesteaders and hobby bakers who like cracked grains and coarse textures will enjoy this mill. It handles those tasks well and cleans up fast.
However, this attachment has clear limits. Serious bread bakers who need fine flour every week may find it frustrating.
The slow speed and cooldown periods do not suit high volume grinding. If you grind wheat berries daily, look at dedicated standalone mills instead.
The Mockmill and other dedicated grain mills grind faster and produce finer, more consistent flour. They cost more upfront, but they perform better for frequent bakers.
Third party all metal attachments with more grind levels are another option. These give you extra control if you want finer settings than the standard nine.
For most casual users though, the KitchenAid Grain Mill does its job. It grinds grain in small batches and stores away easily when you finish.
Think about your baking habits before you decide. Occasional grinding sessions work well with this attachment. Daily or weekly fine flour needs might push you toward other tools.
This mill rewards patience. You wait longer for results, but you get functional flour for home baking projects.
If you want a simple, space saving tool that works with your existing mixer, this attachment delivers. Just set realistic expectations about speed and capacity.
In short, this mill suits light, occasional grinding needs. It is not built for heavy, frequent flour production, but it handles smaller jobs reliably when you use it the right way.
Frequently Asked Questions
How long does the KitchenAid Grain Mill take to grind flour?
Grinding time depends on your grind setting. Coarse grinding finishes quickly. Fine flour takes significantly longer, sometimes 10 to 15 minutes per batch. The motor slows down as you choose finer settings. This is normal for attachment-style mills. If speed matters to you, dedicated standalone mills work faster.
Why does my grain mill overheat?
The attachment generates heat during operation. After grinding 2 to 3 batches, the motor needs a cooldown period. This protects the KitchenAid mixer from damage. Fine grinding produces the most heat because the burrs work harder. Let it rest for 30 minutes before grinding again. This is a design limitation of attachment mills.
Can I grind other ingredients besides grains?
Yes, you can grind dried beans, seeds, and legumes. The mill handles cracked grains exceptionally well. For nuts or spices, check your mixer’s manual first. Some users report success with coffee beans. Always clean between different ingredients to avoid flavor mixing.
What’s the difference between this and the Mockmill?
The Mockmill produces finer, more consistent flour in less time. It operates as a standalone unit, so it never overheats. Mockmill also runs quieter. The KitchenAid attachment works better if you already own the mixer and grind occasionally. Mockmill suits serious bread bakers who grind regularly.
How do I prevent flour dust in my kitchen?
Use the attachment over a large bowl or bin. Flour dust escapes during operation. Wear a dust mask if you’re sensitive. Clean your workspace immediately after grinding. The metal housing collects dust inside, so brush it out regularly with the included brush.

DK Jacks is a passionate food enthusiast, recipe developer, and culinary explorer. With a love for both traditional and innovative flavors, DK brings a fresh perspective to the kitchen. When not experimenting with new ingredients, you’ll find DK capturing food moments through the lens or sharing cooking tips with fellow foodies.🍽️📸✨
